
How to Select the Best Roofing Underlayment for Your DIY Project?
Choosing the right roofing underlayment is a critical decision for any DIY roofing project. It acts as a protective barrier between the roof deck and the roof covering, preventing moisture intrusion and enhancing durability. Understanding the different types of underlayment and their unique features is essential for achieving an effective roofing installation.
What is Roofing Underlayment?
Roofing underlayment is a material installed underneath roofing shingles or other roofing materials. Its primary purpose is to provide an additional layer of protection against water infiltration, ice dams, and other environmental elements. By acting as a barrier, it helps maintain the integrity of the roof system, extending its lifespan.
Why is Underlayment Important?
The significance of roofing underlayment cannot be overstated. Here are key reasons why it is crucial:
- Moisture Protection: Underlayment adds a waterproof layer, safeguarding the roof deck from water damage.
- Thermal Regulation: Proper underlayment can improve heat retention in colder climates, reducing energy costs.
- Preventing Mold Growth: By keeping moisture at bay, it reduces the risk of mold and mildew development.
- Longevity: It enhances the longevity of the roof system, ultimately saving money on repairs or replacements.
Types of Roofing Underlayment
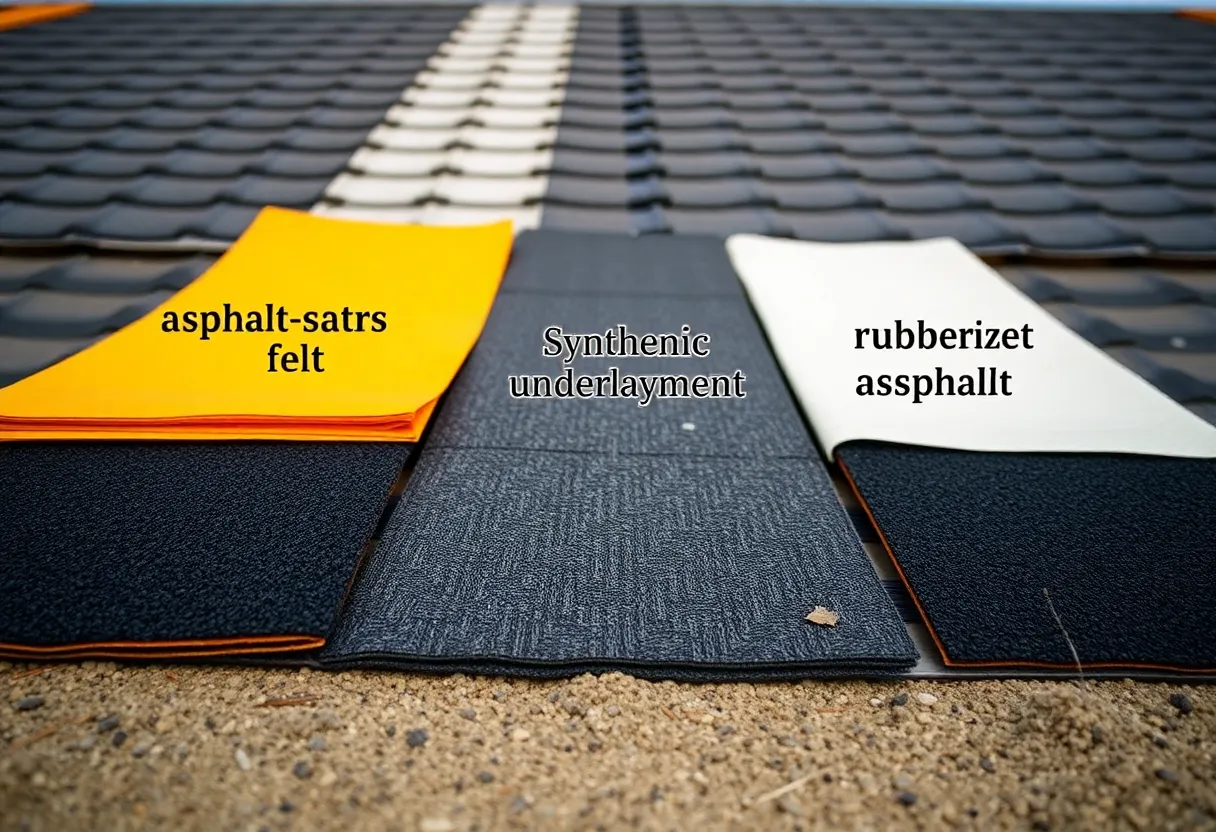
When selecting roofing underlayment, understanding the various types is essential. The three most common types include:
1. Asphalt-Saturated Felt
This is the traditional choice for roofing underlayment. Made from felt paper impregnated with asphalt, it provides good water resistance and breathability. It is typically available in 15-pound and 30-pound rolls:
- Pros: Cost-effective, easy to handle, and has been widely used for years.
- Cons: Vulnerable to tearing, limited lifespan, and potential for moisture absorption.
2. Synthetic Underlayment
Synthetic underlayment is manufactured from polypropylene or polyethylene. It offers superior strength and water resistance compared to felt:
- Pros: Lightweight, resistant to tearing and UV damage, and has a longer lifespan.
- Cons: Typically more expensive than felt, though prices are decreasing.
3. Rubberized Asphalt Underlayment
This type features a sticky backing and is designed to seal around fasteners, providing an excellent water barrier. It’s commonly used in regions prone to ice dams:
- Pros: Outstanding water and ice protection, ideal for low-slope roofs, and self-sealing properties.
- Cons: Generally the most expensive option, and may require professional installation for best results.
Key Factors to Consider When Selecting Underlayment
Here are the essential factors that will help you choose the best underlayment for your roofing project:
1. Climate and Weather Conditions
Consider the local climate when selecting underlayment. Areas with heavy rainfall or snow require highly water-resistant materials. If you live in a warmer climate, UV resistance may be a top priority.
2. Roof Slope
The slope of your roof will impact your choice of underlayment. Steeper roofs can utilize most types, while low-slope roofs may benefit from rubberized asphalt options.
3. Roof Material
Different roofing materials pair better with specific underlayments. For instance, tile roofs require underlayment that can support their weight, while metal roofs typically need breathable options.
4. Installation Difficulty
Some underlayments are easier to work with than others. Synthetic options often have a non-slip surface, making them easier to handle during installation, especially for DIYers.
Common Mistakes to Avoid
When selecting roofing underlayment, it’s easy to make missteps. Here are common mistakes to avoid:
1. Not Considering Local Building Codes
Your region may have specific requirements for underlayment. Always check local guidelines before making your choice.
2. Choosing Cost Over Quality
While it may be tempting to opt for the cheapest option, selecting a high-quality underlayment can save you more in repair costs down the line.
3. Ignoring Manufacturer Specifications
Different roofing materials benefit from specific underlayments. Always refer to manufacturer recommendations to ensure compatibility.
How to Install Roofing Underlayment
Once you have chosen the right underlayment, the next step is proper installation. Here’s a quick guide:
1. Prepare the Roof Deck
Ensure that the roof deck is clean, dry, and free from any protrusions. Repair any damaged areas before proceeding.
2. Install Eaves Protection
For areas prone to ice dams, it’s advisable to install a rubberized underlayment along the eaves. This prevents water from entering the roof deck.
3. Roll Out Underlayment
Starting at the bottom edge of your roof, roll out the underlayment horizontally across the roof deck. Overlap each row by at least 4 inches.
4. Secure the Underlayment
Use roofing nails to secure the underlayment. Space nails around 12 inches apart and ensure that the material lies flat with no wrinkles.
5. Continue the Installation Process
Once the underlayment is in place, continue with the installation of your chosen roofing material, according to the manufacturer’s guidelines.
Conclusion
Selecting the best roofing underlayment for your DIY project is crucial for the overall performance and durability of your roof. By understanding the different types available, considering your specific circumstances, and avoiding common mistakes, you can make an informed decision. Proper installation will ensure that your roof remains protected against the elements for years to come. Whether opting for asphalt-saturated felt, synthetic material, or rubberized asphalt, each choice has its benefits tailored to different situations and climates. Take your time, do your research, and ensure a successful roofing project.